A closet door that drags or jumps its track may need a small adjustment rather than a new door. To find the cause, examine the hardware on the bifold door from the top guide to the bottom bracket, then check alignment and fasteners. Match replacement parts to the folding door’s hardware and measurements before taking the old pieces to the store.
Bi Fold Door Hardware: How the Pieces Work
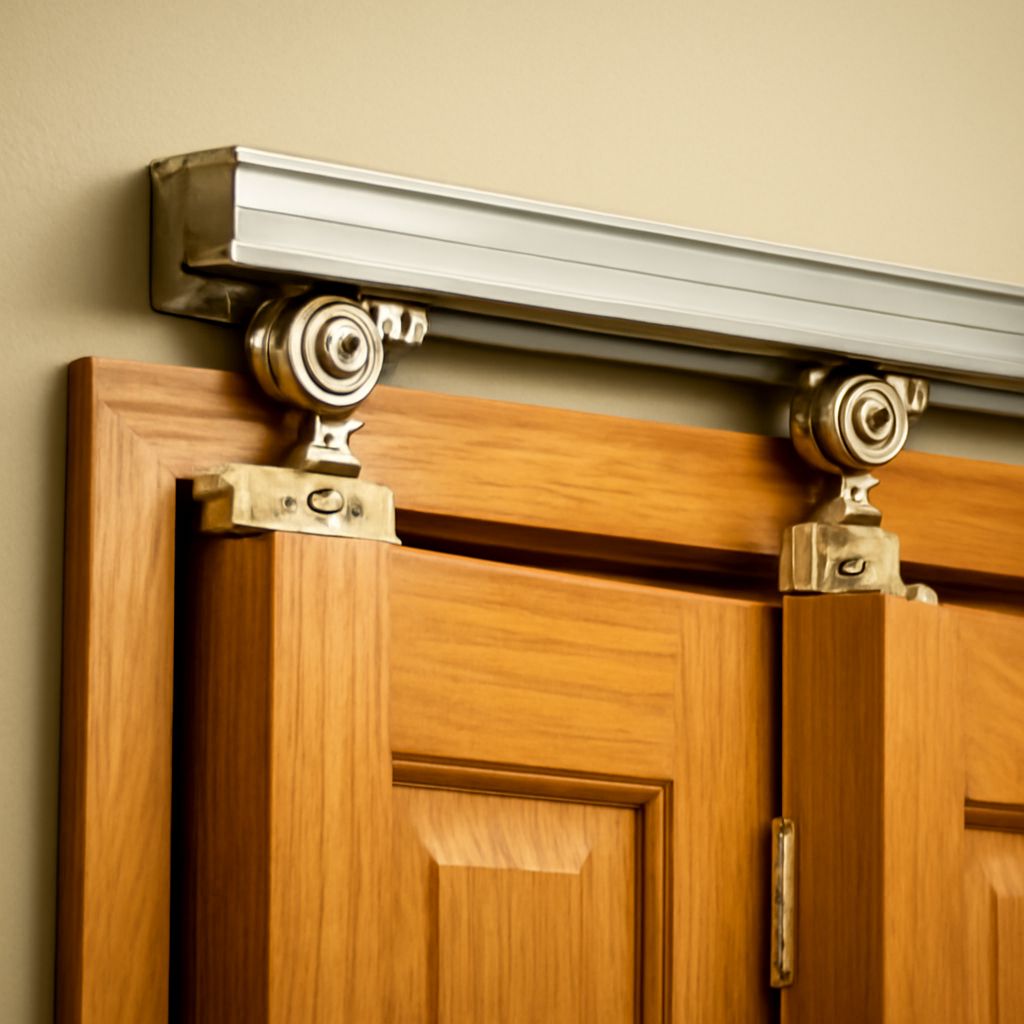
A typical interior closet system has two panels joined by hinges. One panel turns at the jamb on upper and lower pivots; a guide or roller on the other panel travels along the overhead track as the panels fold. Designs vary, including top-hung systems, so identify your mechanism before adjusting it.
- Top track: The channel spans the opening and guides the moving edge. It also holds or locates the upper pivot fitting in many systems.
- Upper pivot: A pin or fitting at the jamb-side top corner keeps the pivot panel located as it turns.
- Lower pivot and bracket: The lower pin seats in a floor or jamb bracket. Depending on the design, it supports or locates the door and may provide height or side-to-side adjustment.
- Guide or roller: A spring-loaded guide or wheeled carrier follows the track and helps keep the moving panel aligned.
- Hinges and pull: Hinges join the panels; a knob or pull gives you a convenient place to move them.
For bifold closet doors, hardware must suit both the panel size and the opening. A heavy solid panel may require a different kit from a lightweight hollow-core door. For bifold doors, hardware ratings apply to the specified panel dimensions and weight, so compare those limits before ordering.
Measure Before Replacing Components
Measure the finished opening’s width and height at more than one point, then measure each panel’s width, height, and thickness. Record the number of panels and whether one or two sets meet in the middle. Look for the manufacturer’s name or model on the track or fittings, and photograph the installed arrangement before taking it apart.
For a replacement bifold door track, measure the existing track length and examine its cross-section. The guide and upper pivot must fit the folding door track profile as well as the door. Some tracks can be cut to length as their instructions permit; others require a particular size or fittings. Do not cut a new track until you have checked the kit’s instructions and the finished opening.
Compare the diameter and length of a pivot pin, the size of its mounting hole, and the bracket or socket it enters. A guide wheel must fit the channel and have the correct stem and mounting method. Take the old piece with you when possible. A package labeled universal may cover a range of sizes, but its dimensions still need to match your door.
For bi fold doors, hardware sold as a complete kit can be economical when several pieces are worn or the existing track has an unknown profile. Check that the kit includes the needed hinges, brackets, screws, and track, and confirm its weight rating. A single matching folding-door fitting is often enough when the rest of the system is sound.
Diagnose a Door That Rubs or Sticks
Open and close the panels slowly while watching the gap at the jamb, the floor, and the top. A narrow gap on one side and a wide gap on the other can reveal a door leaning out of alignment. If the lower corner catches the floor, inspect the bottom pivot and bracket before assuming the panel needs trimming.
Check that the top guide remains seated in the channel and moves freely. Dirt, a loose screw, or a bent section of track can interrupt its travel. Clean the bifold track channel and tighten loose mounting screws into sound framing. Replace a broken guide or damaged track with a compatible part; forcing a wheel past an obstruction can damage it further.
A door that slips out at the bottom may have a loose bracket, a worn socket, or a pivot that is not seated correctly. Support the panels while inspecting them. Do not remove a pivot or bracket while the door’s weight is unsupported.
Adjust the Door
Begin with the door supported and follow the instructions for your particular fittings. On many common designs, a screw releases the top pivot bracket so it can slide along the track; the lower bracket or threaded bottom pivot provides additional lateral or height adjustment. Other systems use different locks and adjustment screws.
Make a small change, tighten the fitting, and test the door through its full travel. Adjust the jamb-side gap until it is reasonably even and leave the clearances specified by the manufacturer at the top and bottom. If two sets meet in the center, adjust each set gradually so the meeting edges align without pushing against one another.
If the pivot hole is worn or the bracket screws will not hold, repair the mounting surface before final adjustment. Tighten hinge screws and inspect the panels for cracks around these bifold parts. Lubricate only if the hardware maker recommends it; a dirty track often needs cleaning more than oil.
What to Buy and Keep
A replacement set of bifold door parts should match the existing door’s mounting style and the track’s profile. If you replace the complete system, choose a kit for the opening, panel thickness, and weight, then follow its fitting diagram. Use the fitting diagram supplied with your kit to locate its pivots and brackets.
Keep the instructions and any adjustment tool with spare screws. The correct bifold door hardware saves a second trip when a small component wears out, and properly fitted bi-fold door hardware lets the panels fold without scraping the frame. For closet bifold door fittings, note the model and dimensions before the packaging is discarded.
When the door binds, watch where it touches, support the panels, and adjust the appropriate pivot in small increments until the gaps are even and the door travels freely.