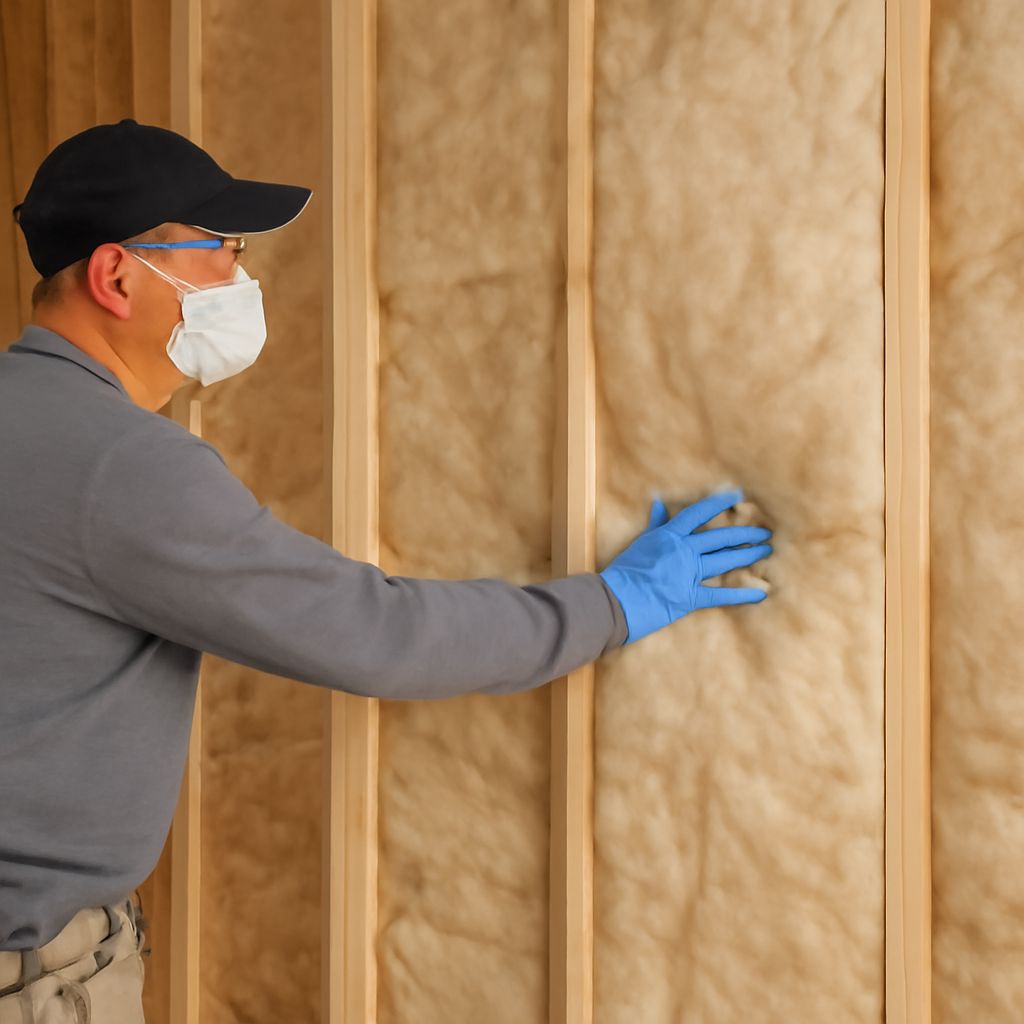
Blow in insulation in walls is the most practical way to add insulation to an existing home without opening up finished walls. Whether your home was built without wall insulation or with minimal fiberglass batts that have settled or degraded, blowing insulation into walls can cut heat loss through exterior walls without the cost and disruption of a full gut renovation.
This guide covers the process of blowing insulation in walls—the materials used, drilling and patching approach, what to expect in terms of R-value improvement, and when to call a professional versus doing it yourself.
Materials used for wall blow-in
Two materials dominate blow in insulation walls applications:
Cellulose: Recycled newspaper fiber treated with borate compounds for fire and pest resistance. It’s dense enough to fill wall cavities without settling as much as fiberglass and provides some air resistance as well as thermal resistance. Dense-pack cellulose in a 3.5-inch wall cavity achieves approximately R-13 to R-14.
Fiberglass (loose-fill): Lighter than cellulose and drier to handle, but more prone to settling in wall cavities if not installed at adequate density. Dense-pack fiberglass achieves R-13 to R-15 in a 3.5-inch cavity when installed correctly.
Some contractors use two-component spray foam for small areas or particularly hard-to-reach cavities, but the cost is significantly higher and the application requires specialized equipment.
The drilling and injection process
How to blow insulation in walls requires drilling access holes—either from the exterior (through the siding) or from the interior (through the drywall). Exterior drilling is more common in professional applications because:
- The siding typically covers the patch better than interior patches
- You avoid disturbing finished interior walls and paint
- The installer can work down the exterior of the home systematically
For exterior drilling, a section of siding is removed to expose the sheathing, holes are drilled through the sheathing into each stud bay (typically one hole per bay, near the top), insulation is injected, and the sheathing hole is plugged before the siding is reinstalled. The holes are typically 2 to 3 inches in diameter.
For interior drilling, 2-inch holes are made in the drywall surface in each stud bay (one near the top of each cavity), insulation is injected, and the holes are patched with drywall plugs and compound. Interior drilling works in homes where siding would be difficult to remove or re-match.
R-value gains from blowing insulation in walls
An uninsulated 2×4 exterior wall has an effective R-value of roughly R-3 to R-4 (from the drywall, sheathing, and siding combined). Filling the stud cavity with dense-pack cellulose or fiberglass brings the total wall assembly R-value to approximately R-13 to R-15. That’s a meaningful improvement in heat retention in cold climates.
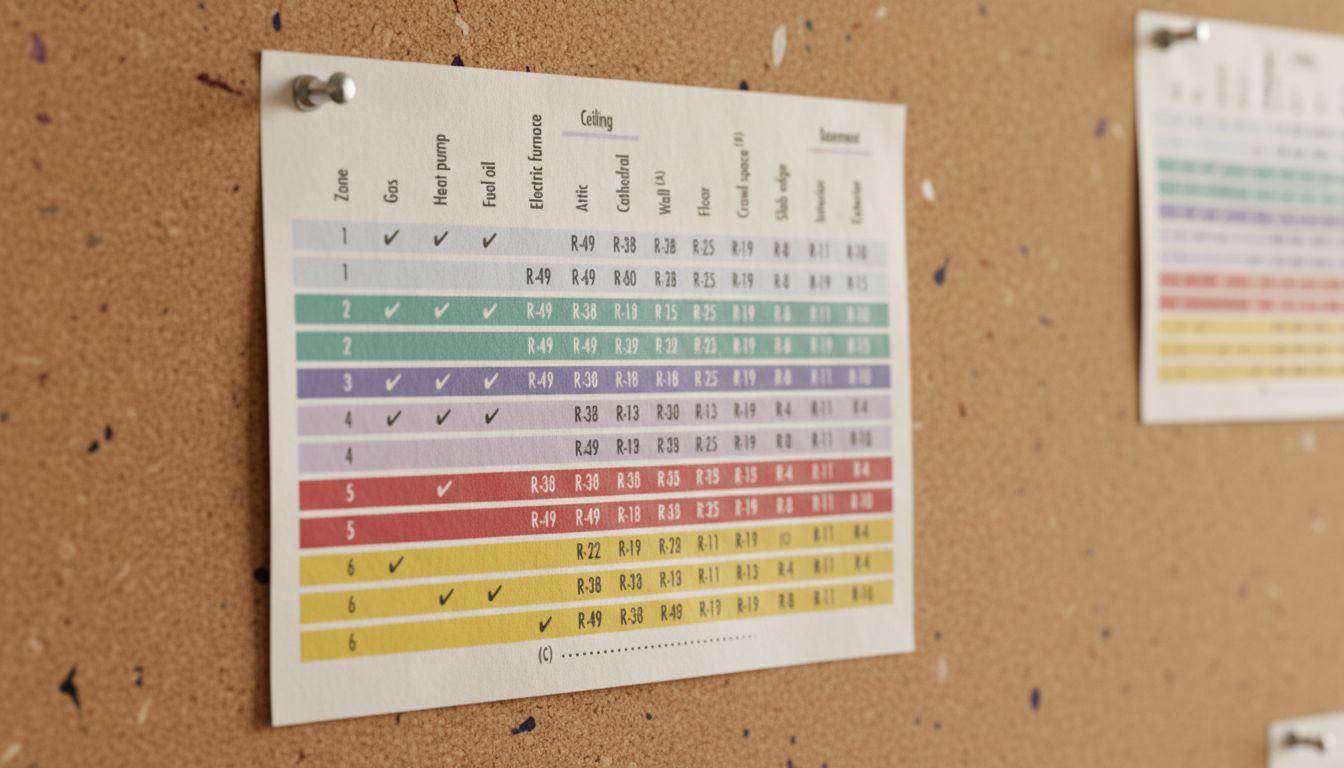
In climate zones 5–7, the DOE recommends wall R-values of R-20 or higher for new construction. Blow-in insulation in walls of an existing home won’t hit that target without adding continuous exterior insulation, but it dramatically reduces the thermal penalty of an uninsulated wall and typically delivers a payback period of 5–10 years in heating-dominated climates.
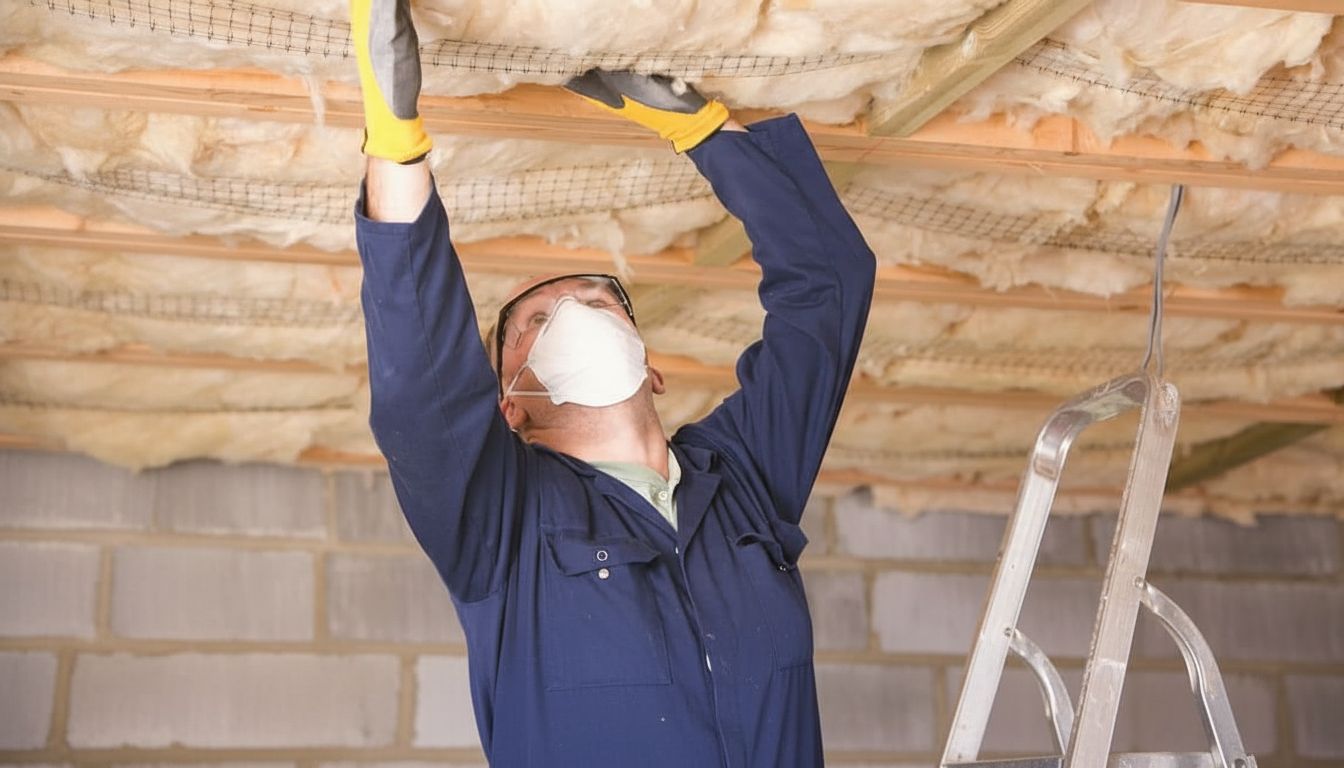
Dense-pack technique
Dense-pack cellulose or fiberglass requires injecting insulation at a higher density than standard blown-in attic applications—typically 3.5 lbs per cubic foot for cellulose, 1.8–2.2 lbs per cubic foot for fiberglass. This higher density is what prevents settling in vertical cavities and provides the air resistance that makes wall insulation effective.
Dense-pack requires a fill tube inserted to the bottom of the cavity, then slowly withdrawn as insulation is packed in from the bottom up. The installer must feel the back pressure in the hose to gauge when the cavity is full—a skilled dense-pack installer can tell by resistance when each section is properly filled. Underfilled cavities settle and leave gaps; overfilled cavities can bow drywall or push siding out.
DIY vs. professional installation
Dense-pack wall insulation is more technical than attic blow-in work. Getting the density right requires experience with the specific equipment and material. Most homeowners who attempt DIY dense-pack wall insulation either underfill (leaving settling gaps) or drill more holes than necessary, making patching more involved.
Professional contractors who specialize in blow in insulation walls work routinely know the material behavior, have the right fill tubes and pressure gauges, and can work efficiently. Get at least two quotes from insulation contractors—price varies significantly, and the difference between a specialist and a general contractor on this type of work is often meaningful in quality.
Pro tips recap: Cellulose dense-pack is the most popular material for blowing insulation into walls due to its air resistance and settled density. Drilling from the exterior is less disruptive to finished interior surfaces. Expect to go from roughly R-4 to R-13 in a standard 2×4 wall. Hire a specialist for dense-pack applications—the density requirements are specific and the consequences of underfilling (settling, air gaps) show up in your energy bills over time.