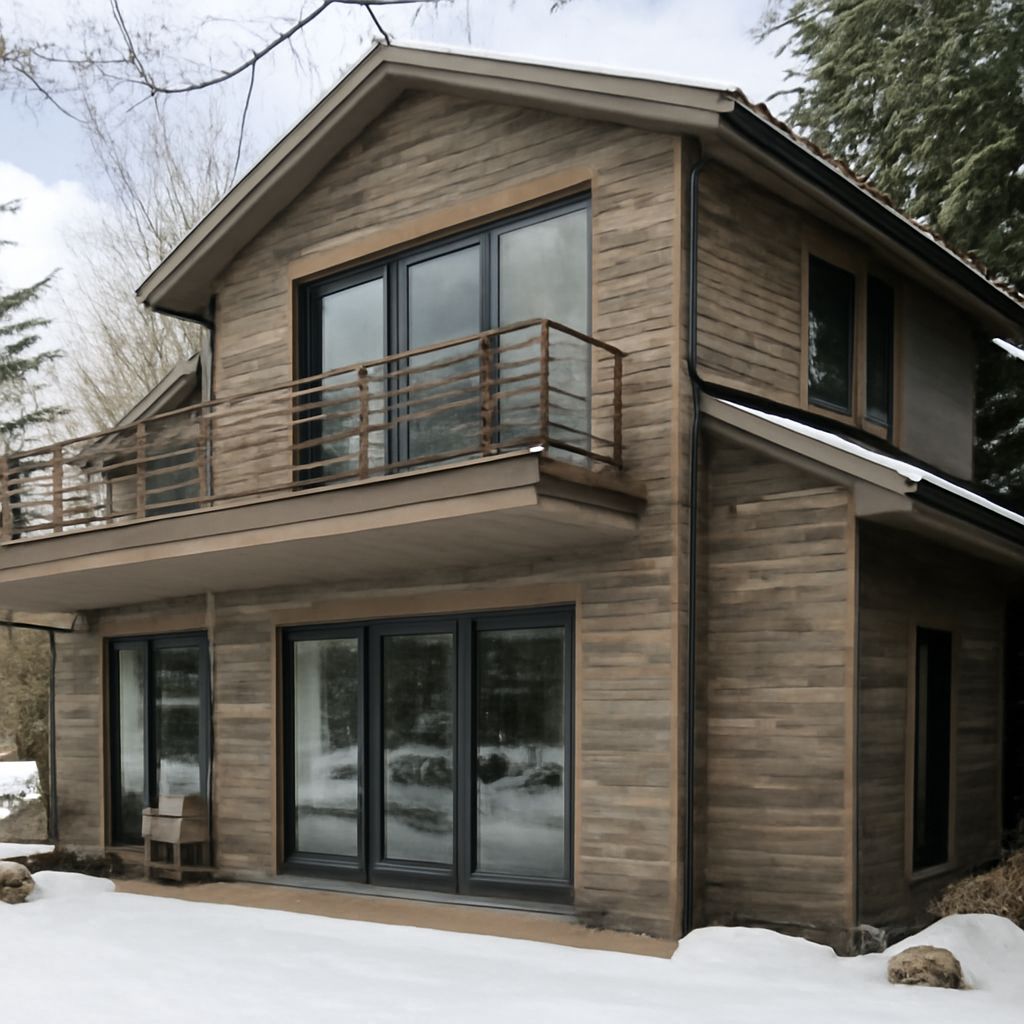
Cedar clapboard siding is the traditional horizontal wood siding profile that defines the look of New England homes and craftsman bungalows across the country. If you’re comparing cedar lap siding options and trying to figure out what makes cedar bevel siding different from other wood profiles, the key is in the taper: clapboards are thicker at the bottom edge and thin at the top, creating a natural water-shedding overlap when installed horizontally. Beveled cedar siding and clapboard siding mean the same thing in most contexts. This guide covers the profiles, what makes bevel cedar siding the right or wrong choice for different applications, and how to install and maintain it properly.
Whether you’re replacing rotted sections on a historic home or starting fresh on a new build, understanding how cedar lap siding is manufactured, priced, and finished helps you make choices that hold up for decades rather than years.
What Makes Cedar Clapboard Different from Other Wood Siding
The Bevel Profile Cedar clapboard siding is cut with a bevel that makes one edge significantly thicker than the other. Typical bevel dimensions run 3/8 inch at the thin edge and 3/4 inch to 7/8 inch at the thick (butt) edge, though wider boards and thicker profiles are available. Cedar bevel siding installs with the thin edge overlapping the thick edge of the course below, creating the classic stepped shadow line that makes this profile distinctive.
The overlap ratio (how much one board laps over the one below) determines the exposed face width. A 6-inch cedar lap siding board with a 1.5-inch overlap exposes 4.5 inches to weather. Wider exposure looks bolder; narrower exposure creates finer shadow lines. Both are correct, and the choice affects both aesthetics and the number of boards needed to cover the wall.
Bevel Cedar Siding Grades
Beveled cedar siding comes in several grades. Clear (also called A-grade or Clear Vertical Grain) has tight grain and minimal knots and is the premium option for applications where the wood will show through a transparent or semi-transparent stain. Knotty grades (Select Knotty, Rustic) have more character and are appropriate for painted applications or rustic aesthetics where knots are a feature rather than a defect. Clear grades cost significantly more but finish more consistently and resist moisture penetration at knots better than knotty grades.
Installation Best Practices for Cedar Lap Siding
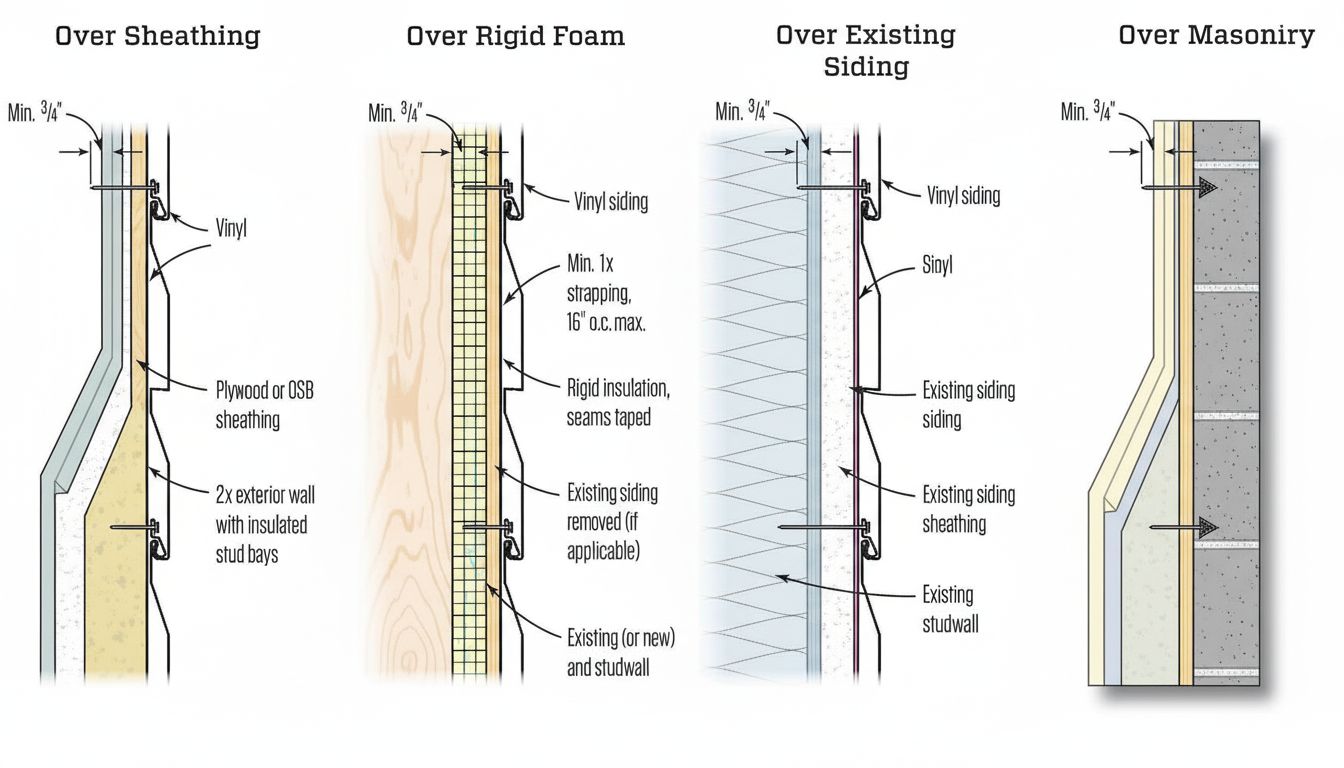
Moisture Barriers and Ventilation Installing cedar bevel siding properly starts before the first board goes up. A continuous weather-resistant barrier over the sheathing, combined with a ventilated rainscreen gap between the barrier and the siding, lets any moisture that gets behind the boards escape rather than accumulating. This gap is typically 3/8 to 3/4 inch, created by installing vertical furring strips before the siding. Rainscreen installation extends the life of cedar clapboard siding significantly compared to direct-to-sheathing installation.
Back-prime every board before installation. Coating all six faces, including the back and both ends, with an exterior primer seals the wood against moisture absorption from the building side, not just from weather. Skipping back-priming is the single most common reason cedar lap siding fails prematurely in high-humidity climates.
Fastening Cedar Clapboard
Stainless steel or hot-dipped galvanized ring-shank nails are the correct fasteners for cedar clapboard siding. Standard electroplated nails rust and stain the wood with orange streaks within a few seasons. Drive fasteners at the butt edge of each board, just above the top of the course below, to allow the wood to move with seasonal moisture changes. Over-driving fasteners splits the wood and creates entry points for water.
For beveled cedar siding wider than 6 inches, use two fasteners per stud crossing to prevent cupping. Wider boards have more tendency to cup across the grain as they dry and wet seasonally, and a single fastener at the butt doesn’t control this movement.
Finishing and Maintenance for Bevel Cedar Siding
Cedar clapboard siding accepts paint, solid stain, semi-transparent stain, and clear penetrating finishes. Paint and solid stain hide the grain but provide maximum UV protection and the longest maintenance intervals (7 to 10 years between full repaint). Semi-transparent stains let the grain show and typically need renewal every 4 to 6 years. Clear penetrating finishes show the most grain but require the most frequent renewal, every 2 to 3 years on exposed elevations.
Annual inspection is the most cost-effective maintenance step. Check caulk at corner trim, window and door head flashing, and butt joints for any cracking. Spot-prime and re-caulk early; water behind cedar clapboard siding causes rapid rot that requires board replacement rather than just refinishing.
Next steps: Choose your finish system before buying cedar lap siding, since the grade selection depends on whether you’re painting (knotty is acceptable) or staining (clear grade shows better). Back-prime before installation regardless of finish system. Plan for maintenance on a fixed schedule based on your finish type, and inspect caulk annually to catch failures before they become structural problems.