Basement Ceiling Insulation: How to Insulate and Drywall a Ceiling
Basement ceiling insulation serves two main purposes: thermal separation between an unheated basement and the living space above, and sound attenuation between floors. The question of how to handle basement ceiling finish — whether to install drop ceiling insulation in an acoustic tile system or learn how to drywall a ceiling for a harder finished look — depends on your priorities for access, acoustics, and appearance. This guide also covers vaulted ceiling insulation for sloped ceiling applications and the complete process for how to install insulation in basement ceiling spaces effectively.
Whether your basement is heated or unheated, insulating the ceiling between floors provides measurable sound reduction and helps maintain comfortable floor temperatures in the living space above.
Basement Ceiling Insulation Options
Drop ceiling insulation for accessible ceilings
A drop ceiling (suspended grid) with insulated panels provides drop ceiling insulation while maintaining access to plumbing, electrical, and ductwork above. Acoustic ceiling tiles provide some sound absorption (NRC ratings of 0.55 to 0.75 for quality panels) but do not significantly insulate thermally unless you add fiberglass batts in the joist cavities above the grid.
For a heated basement, basement ceiling insulation between the first floor joists — typically R-13 to R-19 fiberglass batts in 2×8 or 2×10 joist bays — reduces sound transmission between levels. The drop ceiling grid then serves as the visual finish below the insulated joist bays, creating a layered thermal and acoustic system.
How to install insulation in basement ceiling
The process for how to install insulation in basement ceiling joist bays: measure the joist bay depth and order batts sized to fill it completely (unfaced R-13 for 2×4, unfaced R-19 for 2×6, etc.). Friction-fit the batts snugly between joists with the vapor retarder (if used) facing the warm side — toward the living space above. Use insulation supports (wire or plastic rods that spring between joists) to hold batts in place if needed. Avoid compressing batts — compression reduces R-value proportionally.
How to Drywall a Ceiling: Step-by-Step Guide
Understanding how to drywall a ceiling requires respecting that ceiling installation is the most physically demanding drywall task. Always use a drywall lift — renting one for $30 to $60 eliminates the need for overhead lifting and allows one person to manage large sheets.
Key steps for drywalling a basement ceiling:
- Install all insulation before drywalling — you cannot add it afterward without removing panels
- Mark joist locations on the walls before panels cover them
- Use 1/2-inch drywall on ceiling joists at 16 inches on center; use 5/8-inch for 24-inch joist spacing to prevent sagging
- Drive screws every 8 inches into the framing — ceiling drywall faces more gravitational stress than wall panels and needs closer fastener spacing
- Stagger end joints between adjacent rows to avoid continuous seams
- Apply joint compound in three coats with full drying between each
Vaulted Ceiling Insulation Techniques
Vaulted ceiling insulation presents the challenge of limited depth between the insulation layer and the roof deck. A standard 2×10 rafter in a vaulted ceiling provides only 9.25 inches of cavity depth, and building codes require a minimum 1 to 2-inch air gap between insulation and roof deck for ventilation — leaving only 7 to 8 inches for insulation in a 2×10 rafter bay.
Options for maximizing vaulted ceiling R-value include: dense-pack spray foam on the underside of the roof deck (eliminating the need for a vent channel), furring strips on the underside of rafters to add insulation depth below the rafter bottom, and rigid foam on the exterior above the roof deck (in re-roofing situations) to add continuous R-value without consuming interior depth.
Choosing Between Drop Ceiling and Drywall for Basements
The choice between drop ceiling and drywall for a basement ceiling comes down to three factors: access needs, aesthetics, and cost. If your basement has plumbing, HVAC, or electrical that may need service access, a drop ceiling grid is significantly more practical — panels lift out in seconds versus cutting and patching drywall for every access need.
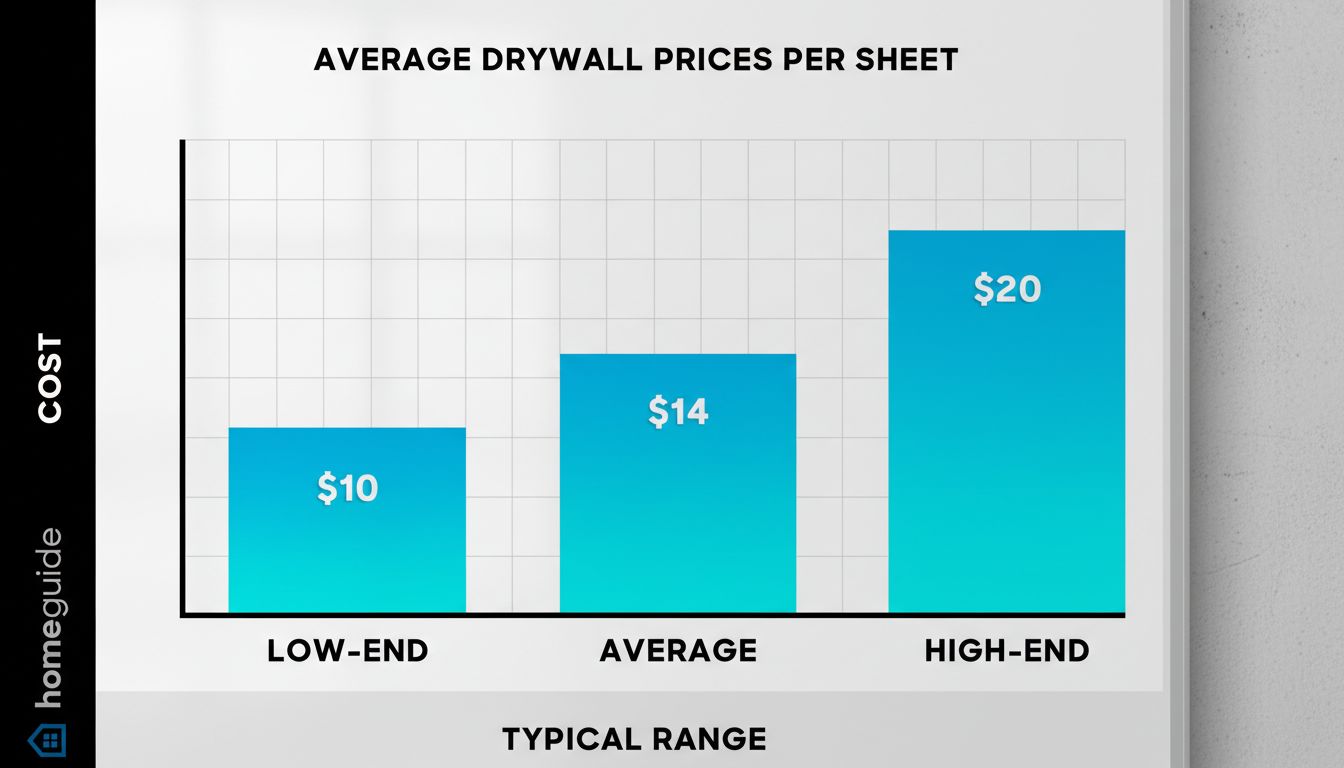
Drywall delivers a cleaner, more finished appearance and is preferred when the basement will function as a primary living space. It also provides better sound isolation than most drop ceiling systems. The higher labor cost of drywalling a ceiling compared to installing a grid system is real — budget 50 to 100 percent more labor time for a drywalled ceiling versus a drop ceiling of the same area.
Safety recap: Always use fall protection or a proper work platform when working overhead on ceilings — step ladders on even flat basement floors are inadequate for extended overhead work. A rented drywall lift or scaffold frames are the safe tools for ceiling installation work.