Adding a bathroom in a basement is one of the most valuable finishing projects a homeowner can undertake — and one of the most technically demanding from a plumbing standpoint. Unlike above-grade bathrooms where drain lines run downward by gravity to the main sewer, basement bathroom plumbing often requires lifting waste upward to reach the main drain line or municipal sewer connection. Understanding the options for basement plumbing, how basement toilet plumbing works below the main drain, and how to plan your basement bathroom plumbing layout ensures a successful, code-compliant installation.
This guide covers the core challenges, drainage solutions, layout planning, and how basement wall insulation panels interact with plumbing rough-in in a basement finishing project.
Basement Bathroom Plumbing Basics and Challenges
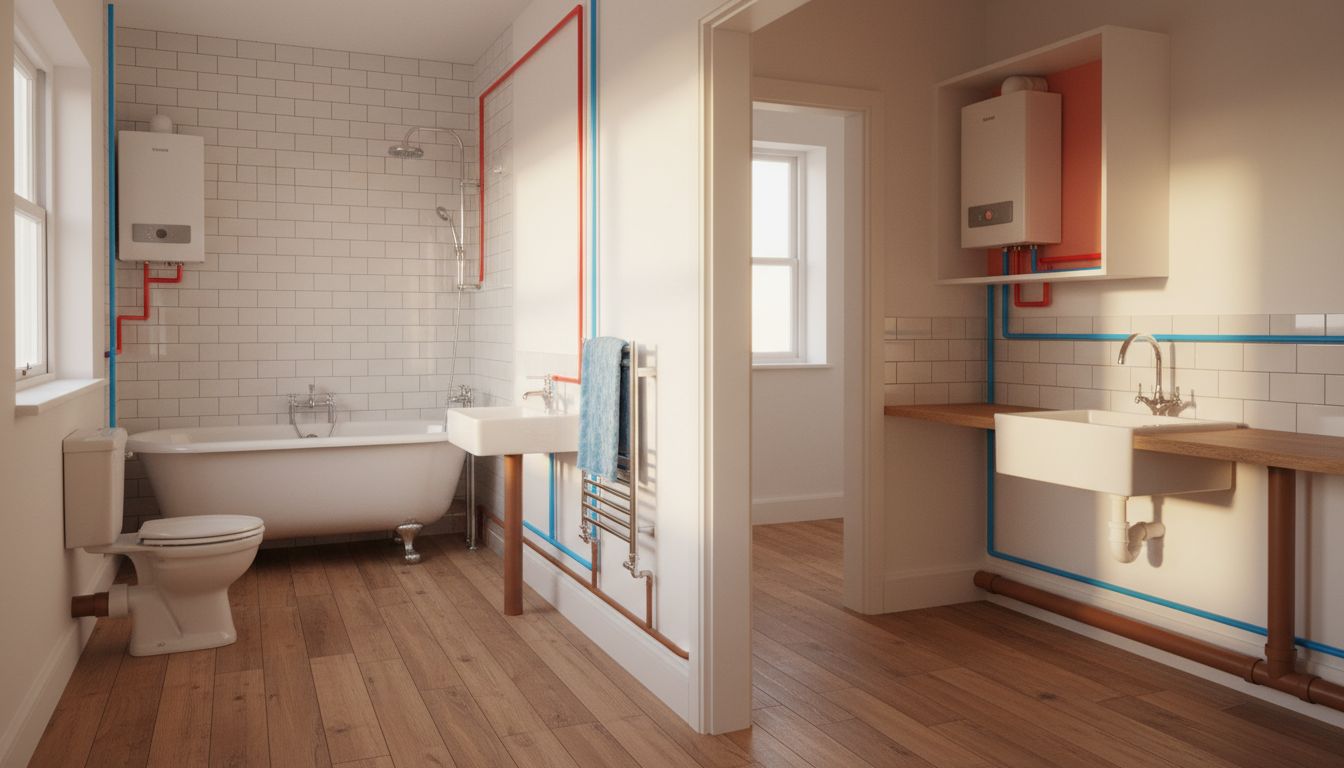
The fundamental challenge of basement plumbing is gravity. In a conventional above-grade bathroom, all drain lines pitch downward at 1/4 inch per foot toward the main stack and sewer. In a basement, the floor slab is typically at or below the level of the main drain connection — meaning conventional gravity drainage requires cutting through the concrete slab to install below-slab drain lines that slope to the sewer.
This approach — called below-slab drain installation — is the traditional method. A plumber cuts a trench through the concrete, installs sloped drain lines to the main sewer at the foundation wall, backfills, and patches the slab. It is effective but labor-intensive and costly, typically running $1,500 to $4,000 for the drain rough-in alone depending on depth and complexity.
Basement Toilet Plumbing: Upflush and Ejector Systems
When cutting the slab is impractical or too expensive, basement toilet plumbing can use either a macerating upflush toilet or a sewage ejector system. Both solve the below-grade drainage problem without slab cutting.
A macerating upflush toilet (brands like Saniflo) integrates a grinder pump directly into the toilet base. The unit grinds waste and pumps it upward through a 1-inch discharge pipe to the nearest drain line above the basement floor — often the main stack or a drain line at the first floor level. Installation requires only electrical connection and a small-diameter discharge pipe, making it a fast, non-destructive option. Limitations: higher purchase cost ($800 to $1,500 for the unit), requires electricity to operate, and needs periodic maintenance.
A sewage ejector pit is a more robust solution for a full basement bathroom. A sealed pit is installed in the slab (still requiring some concrete cutting, but only for the pit rather than full trenching), and an ejector pump in the pit collects waste from toilet, sink, and shower, then pumps it upward to the main drain. Ejector systems handle higher waste volumes and are preferred when installing a full bathroom rather than just a toilet.
Planning Your Basement Bathroom Plumbing Layout
A good basement bathroom plumbing layout minimizes pipe runs, locates the ejector or macerator as close as possible to the main stack, and positions fixtures to allow logical drain line routing. Key planning considerations:
- Locate the toilet adjacent to or against the wall closest to the main stack to minimize the horizontal discharge pipe run
- Position the sink on the same wall as the toilet to share a vent stack
- If installing a shower, the drain must be the lowest point in the floor — this typically requires cutting a small sump area in the slab if using an ejector, or selecting a shower unit with an internal pump for macerating systems
- All vent pipes must extend through the roof or connect to an existing vent stack at a point above the highest fixture in the home
Have your layout reviewed by a licensed plumber before any rough-in begins. Many municipalities require a permit and inspection for basement plumbing, and the permit application typically requires a sketch of the planned layout.
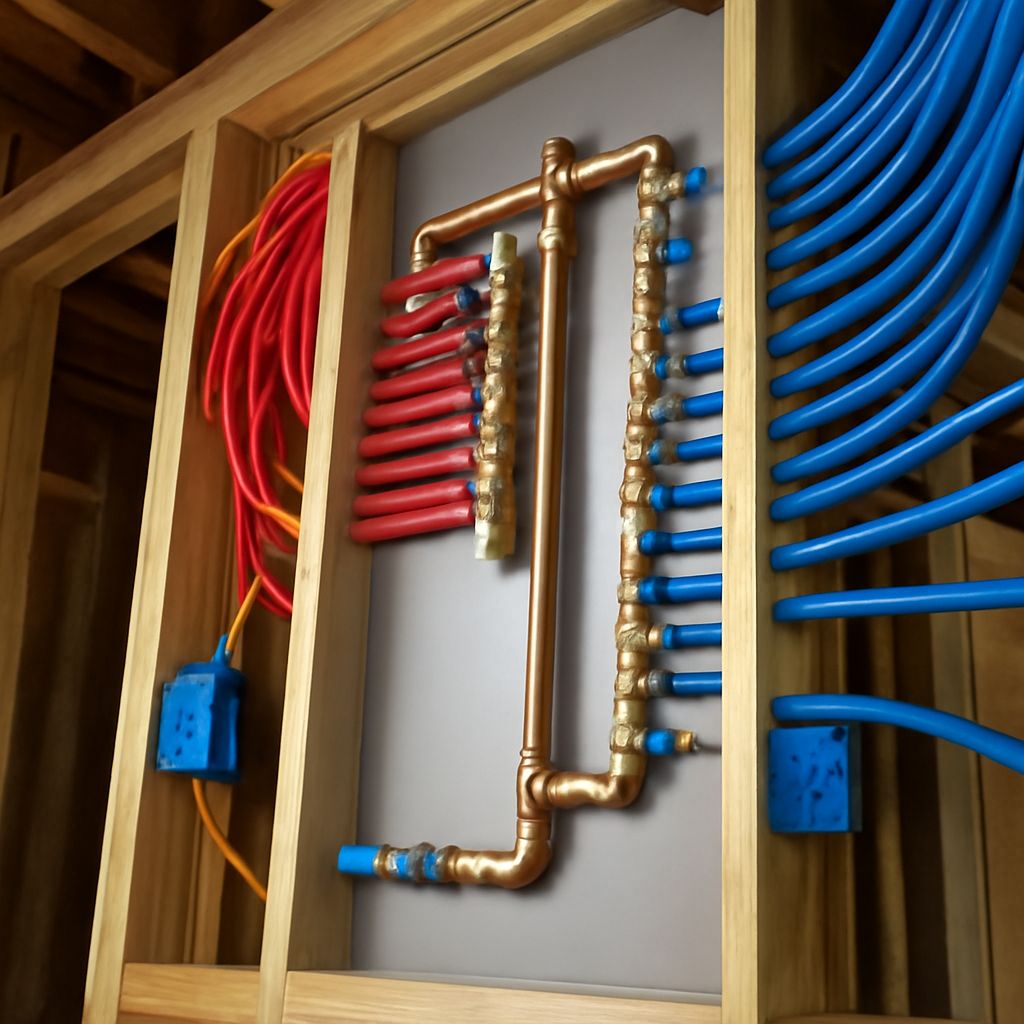
Basement Wall Insulation Panels and Plumbing Integration
Basement wall insulation panels — rigid foam products like Owens Corning Basement Finishing System or similar channel-frame systems — are often installed after plumbing rough-in is complete. The panels typically clip or screw to a frame system that holds them a small distance away from the concrete foundation wall, creating a thermal break and a small chase space.
This chase space is useful for running short horizontal plumbing runs, drain cleanout access, and hiding ejector discharge pipes that must run along the wall before penetrating upward. Plan your insulation panel layout to maintain access to shutoff valves and cleanouts — do not cover these with fixed panels without providing an access panel. Most basement panel systems offer matching access panel trim pieces for exactly this purpose.
Next steps: Before purchasing any basement bathroom fixtures, have a licensed plumber assess your slab thickness, existing sewer connection depth, and the most cost-effective drainage strategy for your specific basement layout. The choice between below-slab trenching and an ejector system depends heavily on your sewer line depth, and only an on-site inspection can determine which approach is right for your home.