Installing Drywall: Step-by-Step Guide to Hanging and Finishing
Installing drywall is the foundational skill of interior construction. From framing a new room to finishing a basement, mastering the process of measuring, cutting, and fastening gypsum panels transforms raw stud walls into finished living spaces. Understanding exterior drywall options for special applications, learning how to hang drywall efficiently, following the correct drywall steps, and knowing when fiberglass drywall is the right choice makes every project go smoothly.
This guide walks you through project planning, material selection, the wall and ceiling hanging sequence, specialty applications, and the finishing steps that lead to a paint-ready surface.
Planning Your Drywall Installation Project
Choosing the right drywall type
Standard 1/2-inch gypsum drywall is appropriate for most interior walls and ceilings with studs or joists at 16 inches on center. Use 5/8-inch Type X for garage walls shared with living space, mechanical room ceilings, and any location requiring a fire-resistance rating. Green board (moisture-resistant gypsum) works for bathrooms and laundry rooms but should not be used in wet areas like shower surrounds — cement board is required there. Fiberglass drywall, such as National Gypsum’s Gold Bond brand, uses a fiberglass mat facing instead of paper, making it inherently mold-resistant and a strong choice for basements and below-grade spaces.
Measuring and ordering materials
Calculate square footage for each room by measuring all wall and ceiling surfaces and subtracting openings. Divide by 32 (the square footage of a standard 4×8 sheet) to get sheet count, then add 10 percent for cuts and waste. Order extra screws — 1-5/8-inch coarse thread for walls, 1-1/4-inch for ceilings — plus joint compound, paper tape, and corner bead.
How to Hang Drywall on Walls and Ceilings
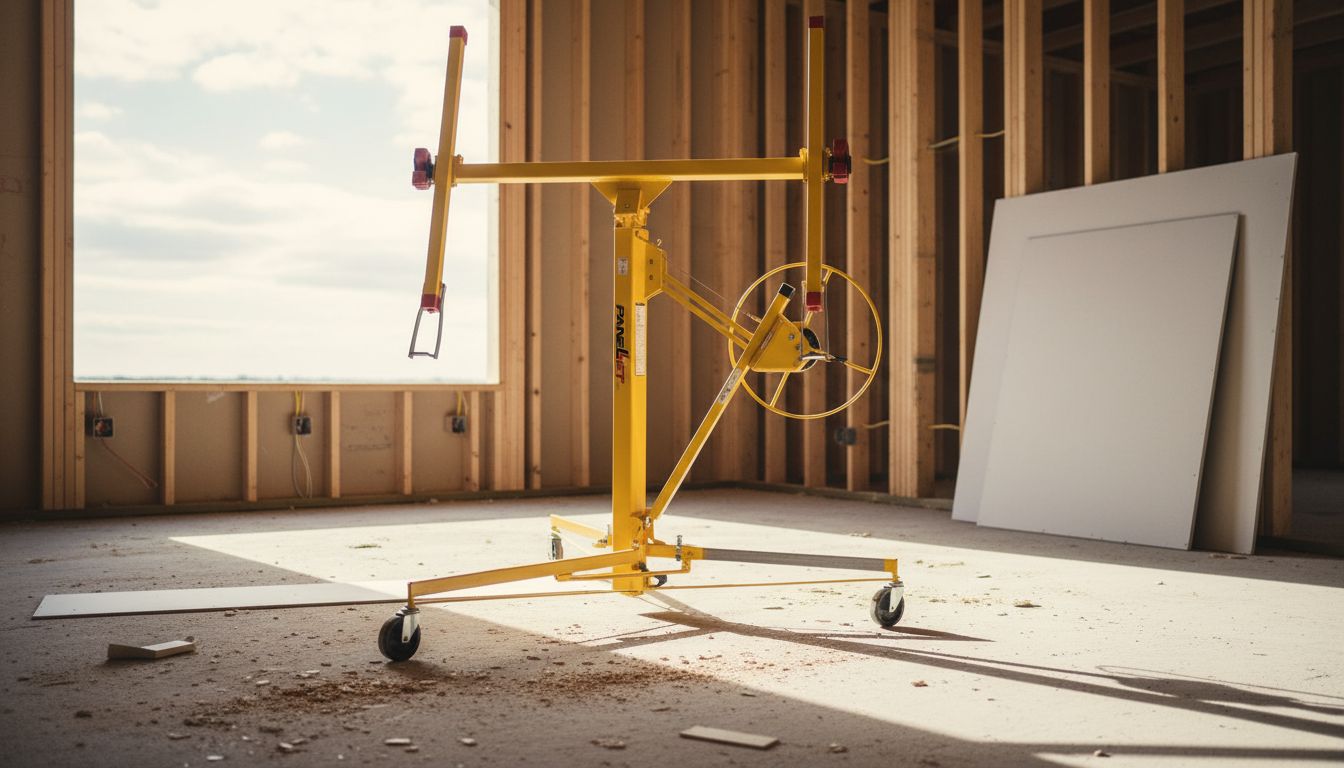
The correct sequence for hanging drywall is ceilings first, then walls. Ceiling panels are the hardest to install and benefit from being supported by the wall panels. Use a drywall lift for ceilings — renting one costs $30 to $60 per day and prevents the back injury that comes from supporting heavy sheets overhead.
For walls, start panels at the top and work down. Hang sheets horizontally (long side parallel to the floor) for stronger joints and easier finishing. Stagger vertical seams so they do not align in adjacent rows. Drive screws every 8 inches along edges and every 12 inches through the field, dimpling the surface slightly without breaking the paper. Mark stud locations on the floor and ceiling before covering them with panels.
Exterior Drywall and Specialty Applications
Exterior drywall is a specialized product designed for covered exterior soffits, porch ceilings, and other sheltered outdoor applications where standard interior gypsum would degrade quickly. These products use glass mat or heavy-duty coatings to resist humidity and occasional moisture exposure. They are not intended for direct weathering — a roof or overhang providing protection is required.
For true exterior applications like covered porch ceilings, exterior gypsum sheathing (used under siding as a structural panel) differs from finish drywall and is not meant for painted interior appearance. Consult product specifications carefully to confirm the application matches the product design before purchasing.
Key Drywall Steps for a Professional Finish
Following the correct drywall steps in sequence prevents rework and ensures a smooth final result:
- Install blocking between studs anywhere you need backing for shelving, grab bars, or heavy wall-mounted items
- Hang ceilings before walls
- Fasten panels with appropriate screw pattern — do not over-drive and break the paper
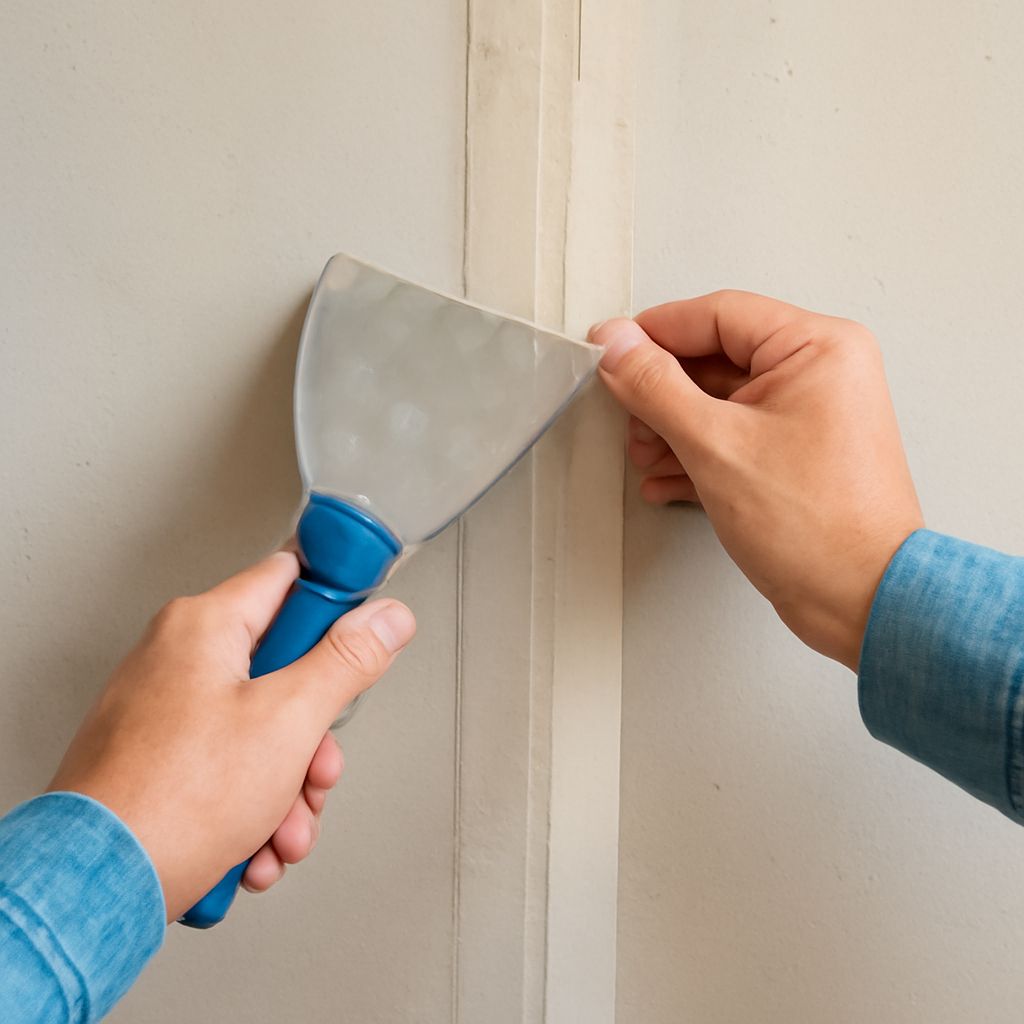
- Install corner bead on all outside corners before taping
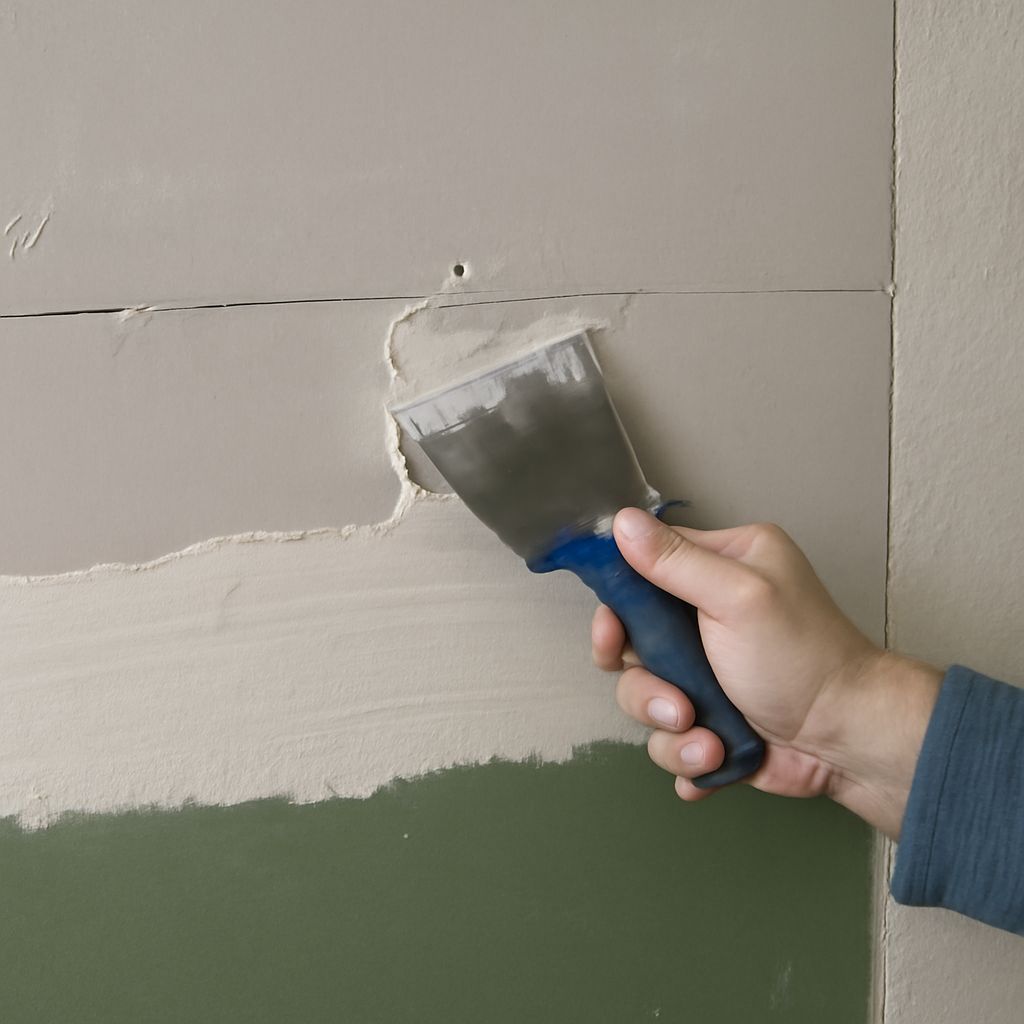
- Apply three coats of joint compound with complete drying between coats
- Sand with 120-grit pole sander, inspect under raking light
- Prime with PVA drywall primer before painting
Pro tips recap: Rent a drywall lift for any ceiling work — it will pay for itself in effort saved in the first 30 minutes. Score and snap drywall rather than sawing for cleaner cuts on straight lines. Use pre-mixed lightweight compound for finish coats — it sands far more easily than all-purpose and shrinks less. If you are unfamiliar with taping technique, practice on a small closet or utility room before tackling a living space.