Blown Attic Insulation: Complete Guide to Blow In Wall and Attic Projects
Blown attic insulation is the fastest, most complete method for insulating both new construction and existing homes. Unlike batt insulation that leaves gaps at joists and blocking, loose-fill material fills every corner, reducing air infiltration and improving R-value uniformly across the entire floor or wall cavity. This guide covers how blow in wall insulation and attic applications work, what the diy blow in insulation process involves, and how to choose the right blow-in insulation material for your project.
Whether you are insulating an open attic floor, topping up existing coverage, or retrofitting blown wall insulation into finished walls, understanding the process and materials available ensures you get maximum thermal performance from your investment.
How Blown Attic Insulation Works
Blowing insulation into an attic involves feeding loose-fill material — cellulose or fiberglass — through a large-diameter hose connected to a machine that shreds bales and propels the material under low air pressure. The installer positions the hose end close to the substrate and gradually backs across the attic floor, building up depth uniformly. The blowing machine, which rental centers and insulation suppliers provide free or low-cost with material purchase, controls material flow through a throttle valve.
The key to successful blown attic insulation is air sealing first. Before adding any material, seal all penetrations — wire chases, pipe runs, recessed light cans (use airtight covers), and gaps at top plates. Air sealing alone can improve energy performance by 15 to 25 percent, and blown insulation performs far better over a sealed substrate than over an unsealed one.
DIY Blow In Insulation: What You Need to Know
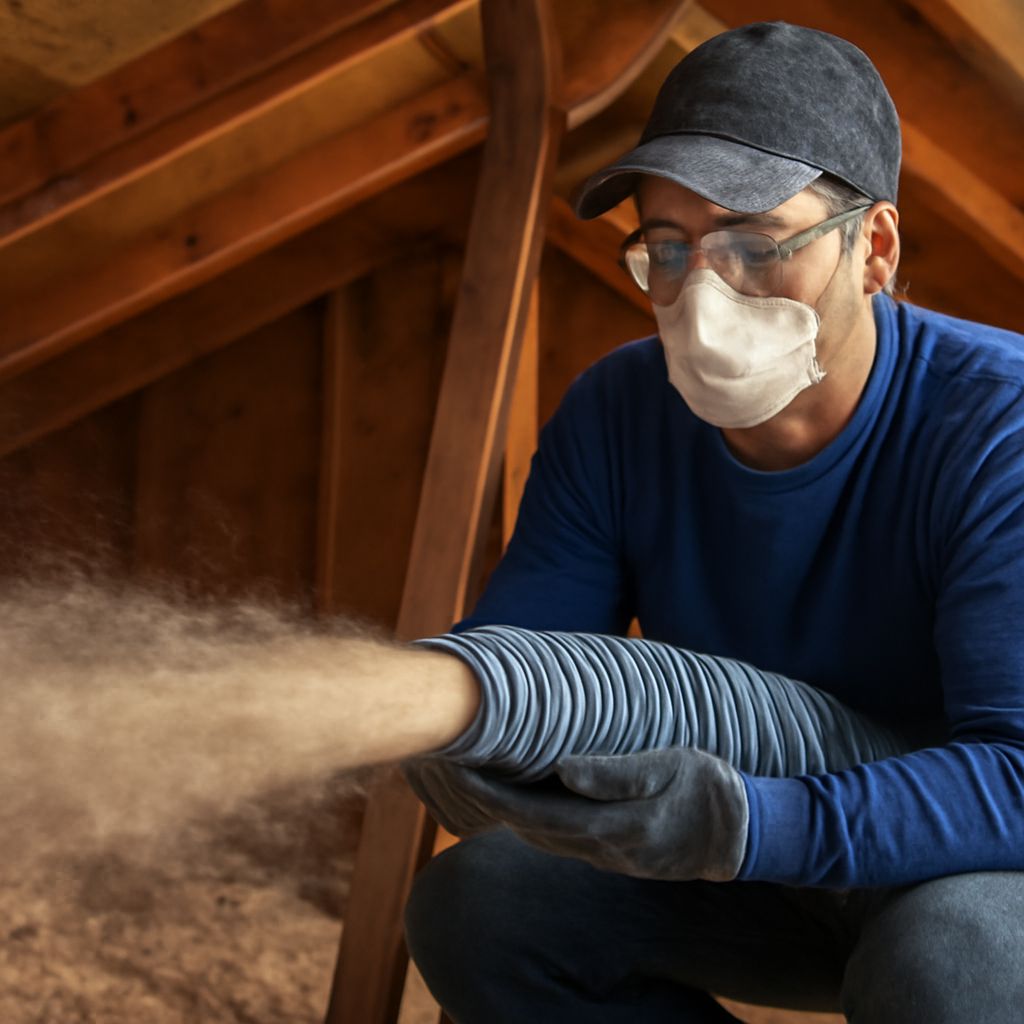
Tackling diy blow in insulation in an accessible attic is a realistic weekend project for most homeowners. The basic steps are: calculate the depth needed for your target R-value, install baffles at all eave vents to maintain airflow, air seal the attic floor, then blow material to the correct depth using depth markers (wooden stakes set at the target height every few feet as guides).
Safety equipment is essential: an N95 or P100 respirator, safety glasses, and gloves. Attics reach extreme temperatures — schedule DIY blowing projects for early morning in warm months or mild days in winter to avoid heat stress. Blown insulation bags specify the coverage area per bag at a given R-value, so your material quantity calculation is straightforward.
Blow In Wall Insulation for Existing Homes
Retrofitting blow in wall insulation into finished walls requires drilling 2 to 3-inch access holes in the exterior or interior finish, typically at the top of each stud bay. A fill tube feeds material into the cavity from the top down. The installer fills until resistance is felt, indicating the cavity is full, then plugs and patches each hole. Dense-pack cellulose is the preferred material for wall retrofits because it achieves 3.5 lb per cubic foot density, which prevents settling and blocks air movement through the wall.
Wall-filling projects are more disruptive than attic work and require patching skills. Many homeowners hire a contractor for wall retrofits while handling attic work themselves. Blown wall insulation costs $1.50 to $3.50 per square foot installed professionally, but the reduction in drafts and energy bills is often noticeable immediately after completion.
Choosing the Right Blow-In Insulation Material
The two main options for blow-in insulation are cellulose and fiberglass loose-fill. Cellulose, made from recycled paper treated with borate fire retardant, delivers approximately R-3.7 per inch installed. It is denser than fiberglass, settles less over time, and performs well in both attic and wall applications. Fiberglass loose-fill provides about R-2.5 per inch but resists moisture better — a consideration in very humid climates or attics with known moisture issues.
For most homes, cellulose is the better value per R-value dollar. For walls, dense-pack cellulose is the clear choice. For attics where fire resistance is a concern or moisture levels are elevated, fiberglass loose-fill is a sound alternative. Consult a licensed insulation contractor if your attic has signs of moisture damage or mold before adding any new material.
Bottom line: Blown attic insulation delivers faster installation, better coverage, and competitive R-values compared to batts. DIY attic blowing is a practical weekend project; wall retrofits are better left to professionals for the best results and cleanest finish.