Vinyl Siding Repair: Step-by-Step Fix Guide for Homeowners
Vinyl siding repair is one of the more accessible exterior projects a homeowner can take on, requiring basic tools and a few hours on a mild day. Knowing how to repair siding properly matters more than speed. A poor patch traps moisture behind the wall and invites rot in the sheathing beneath. This guide also covers specialty plumbing connections that run through exterior walls, including new construction plumbing cost per fixture estimates when siding work exposes pipe penetrations, and explains flush plumbing requirements that keep your exterior looking clean and watertight.
Work through each section in order, and you will have a repaired wall that holds up through seasonal expansion and contraction.
Assessing the damage before you start
Types of vinyl siding damage
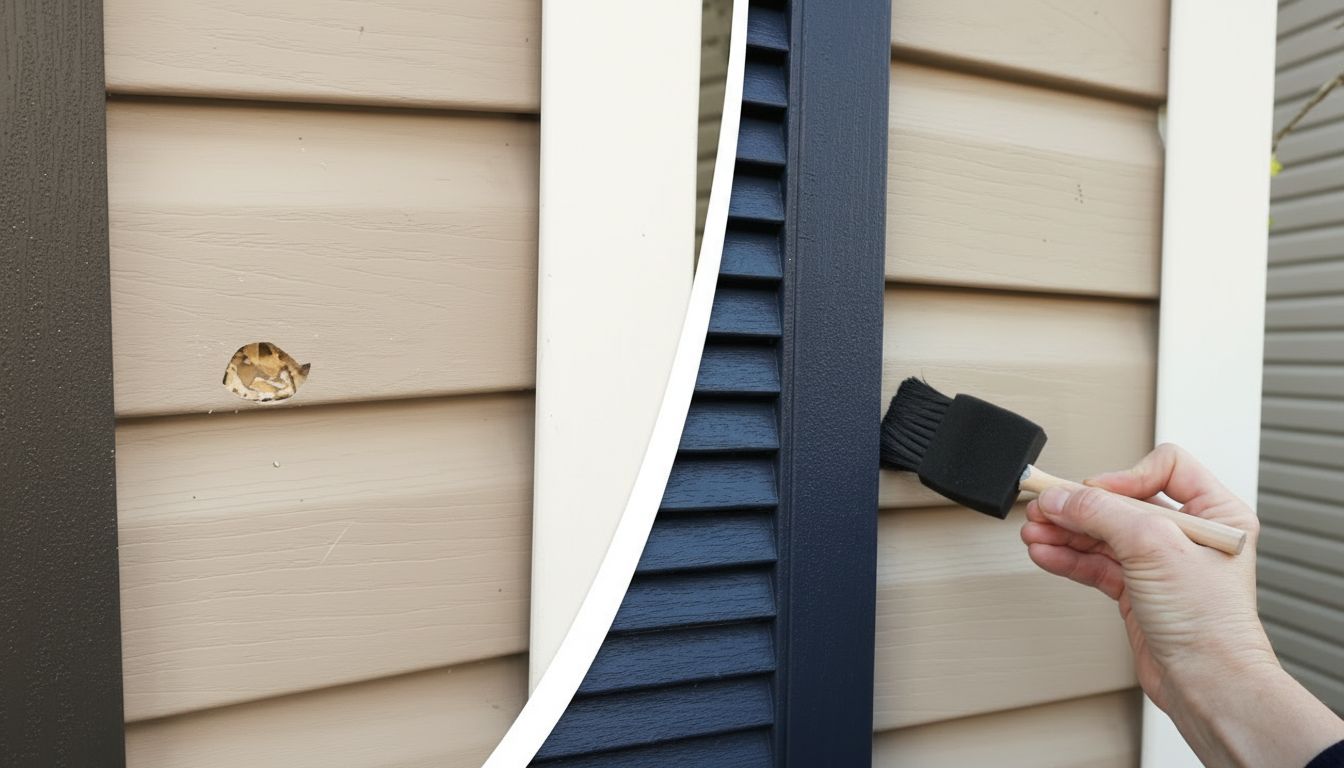
Cracks, holes, and warped panels are the three common failure modes. Cracks from impact can run along the bottom lip or across the face. Warping results from excessive heat near grills or dryer vents. Full-panel replacement is the cleanest fix for any damage longer than six inches. Smaller cracks can be sealed with color-matched caulk as a temporary measure, but plan to replace those boards within a season.
Checking for hidden moisture
Before replacing any panel, press on the sheathing through the damaged area. Soft or spongy material means water has already infiltrated. Fixing the siding surface without addressing wet sheathing leads to mold and structural damage. Dry the area thoroughly and apply a water-resistant membrane before installing new panels.
How to repair siding: panel replacement steps
Removing the damaged panel
A zip tool is the right instrument for siding removal. Slide the curved hook along the bottom edge of the panel above the damaged one, pull down slightly to unlock the overlap, then work your way across. Vinyl siding repair attempts that skip the zip tool risk cracking adjacent panels. Once unlocked, back out the nails holding the damaged piece.
Installing the replacement panel
Cut the new panel 1/4 inch shorter than the opening to allow for thermal movement. Vinyl expands and contracts significantly with temperature. Nail through the center of each elongated slot, not the slot edges, to permit that movement. Overlap the panel below by at least one inch, then lock the upper edge into the course above by pressing firmly until you hear a click.
Specialty plumbing penetrations through siding
When vinyl siding repair exposes a pipe or conduit penetration, you have an opportunity to address weatherproofing around it. Specialty plumbing fittings designed for exterior walls include pre-made wall flanges that create a finished, waterproof seal. For new construction plumbing cost per fixture planning, exterior wall penetrations add $15 to $40 per opening in material costs for proper flashing and sealing components.
Flush plumbing design keeps pipe exits close to the wall surface, reducing the profile of through-wall fittings and making siding installation cleaner. If you have a hose bib or dryer vent that protrudes far from the wall, flush-mount replacements are available at most plumbing supply stores.
Pro tips recap
Store a few extra panels of your siding profile in a shaded garage for color-matched repairs. UV exposure fades vinyl over time, so panels cut from a new box may not match older courses. If color match is critical and stock is unavailable, source salvage pieces from a similar installation. Keep your zip tool handy for future vinyl siding repair work, and inspect the full wall each spring for hairline cracks before they widen.