Sanding Drywall: Techniques, Grits, and Tools for a Smooth Finish
Sanding drywall is one of those finishing tasks that separates a clean, professional-looking wall from one that shows every imperfection under paint. Whether you are finishing new construction or patching a repair, choosing the right sandpaper for drywall and following the correct sequence of grits determines how your paint job looks. This guide walks you through every stage, from the right sandpaper grit for drywall to deciding when to sand drywall by hand versus reaching for a power tool.
You will also learn when sanding drywall with electric sander setups saves time without creating new problems like over-sanding or gouging. Let us start with why the process matters so much.
Why Sanding Drywall Matters for Paint-Ready Walls
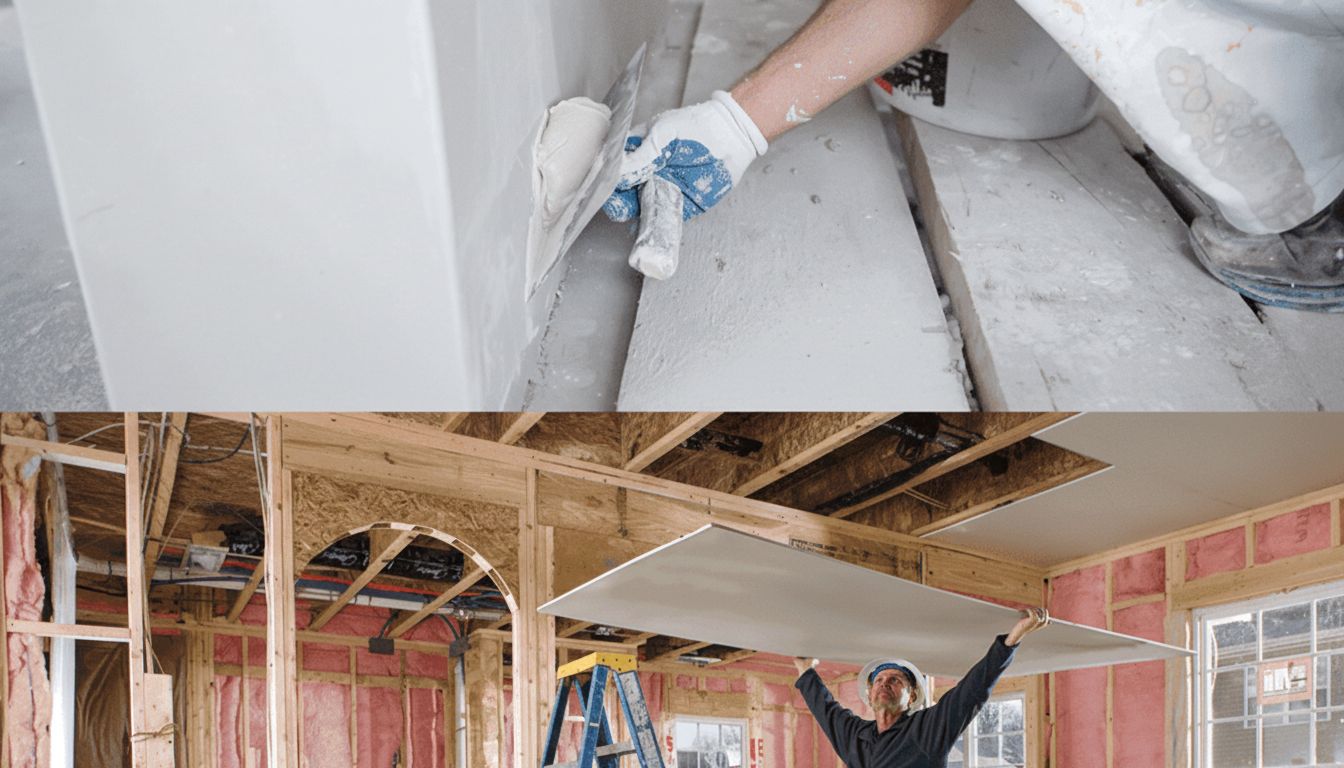
Drywall compound shrinks as it dries, leaving ridges, humps, and tool marks that become highly visible once paint goes on, especially under raking light. Smoothing drywall seams, nail dimples, and patched areas creates an even surface that accepts primer and paint uniformly. Skipping or rushing the smoothing stage means those imperfections telegraph through every coat of paint you apply. It is much easier to smooth a wall before painting than to fix visible ridges afterward.
Choosing Sandpaper for Drywall: Grits Explained
Coarse Grits for Mud Removal
When you need to knock down thick ridges or excess compound from a first or second coat, reach for 60 to 80-grit sandpaper. This coarse range cuts fast but leaves scratches that require follow-up with finer paper. Use it sparingly on drywall since aggressive abrasion can cut through the thin paper facing of the drywall board itself, creating fuzzy patches that will not paint cleanly. The correct sandpaper grit for drywall rough work is 80-grit maximum for most situations.
Medium and Fine Grits for Finish Work
For finish coats and final smoothing, 100 to 120-grit sandpaper for drywall is the most common choice among professional finishers. It removes minor imperfections without cutting too deep. After your finish coat dries fully, sand with 120-grit to level the surface, then follow with 150-grit for a paint-ready result. Some pros use 220-grit for a final scuff before primer on smooth-finish walls, but this level of refinement is optional on most residential projects.
How to Sand Drywall by Hand: Step-by-Step
Hand sanding gives you the most control over pressure and direction. Let the mud dry completely since sanding wet or tacky compound clogs your paper and tears the surface. Wait at least 24 hours per coat in normal conditions. Wrap your paper around a sanding block to distribute pressure evenly and prevent finger-shaped depressions. Work in broad, overlapping strokes parallel to the joint or seam, avoiding circular scrubbing motions that create visible swirl marks. Check your work with a work light held at a low angle to the wall since this raking light technique reveals ridges and low spots invisible under overhead lighting. Feather the edges of each sanded area into the surrounding drywall face so there are no hard transitions, then wipe down with a dry cloth before applying additional coats or primer.
Sanding Drywall with Electric Sander: When and How
Pole Sanders vs. Drywall-Specific Sanders
Sanding drywall with electric sander equipment saves significant time on large surfaces like ceilings and wide wall expanses. Two main types are useful: pole sanders that attach standard sanding sheets and let you reach high areas without a ladder, and powered drywall sanders that use a random-orbital or rotary head and often connect to a dust extractor. Powered sanders speed up the final finishing pass but require a light touch. Pressing too hard or lingering in one spot cuts through the mud and into the paper face of the board.
Dust Control Strategies
Drywall dust is extremely fine and travels far. Before you start sanding drywall with electric sander setups, seal doorways with plastic sheeting and tape. Connect your sander to a shop vacuum or dedicated dust extractor since most drywall-specific sanders have built-in hose ports. Even with extraction, wear an N95 or P100 respirator since drywall dust causes respiratory irritation with repeated exposure. After sanding, vacuum walls with a brush attachment before wiping down with a barely damp sponge to capture residual dust without raising the drywall paper.
Common Sanding Mistakes and How to Avoid Them
The most common errors when people sand drywall are sanding too early before mud fully cures, using too coarse a grit and tearing the paper face, skipping the raking-light inspection and missing ridges, and failing to feather compound edges. Another frequent mistake is applying primer without sanding the final coat at all. Unprimed, unsanded mud absorbs paint differently than the surrounding board, creating visible flashing (sheen differences) that appear after painting. Skim-coating over sanded areas you have damaged and re-sanding is the correct fix, not adding more paint coats.
Bottom line: The right sandpaper grit for drywall is 80-grit for heavy material removal, 120-grit for general finish work, and 150-grit for a paint-ready surface. Invest in a raking work light and proper dust containment, and you will turn smooth, paint-ready walls from frustrating guesswork into a repeatable process.