Wood Shake Shingles: Types, Costs, and What to Know Before You Buy
Wood shake shingles have been covering roofs for centuries, and they still work better than most people expect in the right climate. Natural cedar is dimensionally stable, resists insects, and provides decent thermal mass. But buying the wrong grade or skipping the maintenance schedule turns a premium material into an expensive problem. This guide covers the difference between shakes and shingles, how to evaluate cedar roof shingles by grade, where to find wood shingles for sale at honest prices, and what installation actually requires.
If you’re comparing cedar roofing shingles to asphalt or metal for a specific project, you’ll find the real trade-offs here — not just the marketing pitch. And if you’ve already decided on wood, we’ll show you how to find the best cedar shingles for sale for your budget.
Wood Shake vs. Wood Shingle: What’s the Difference
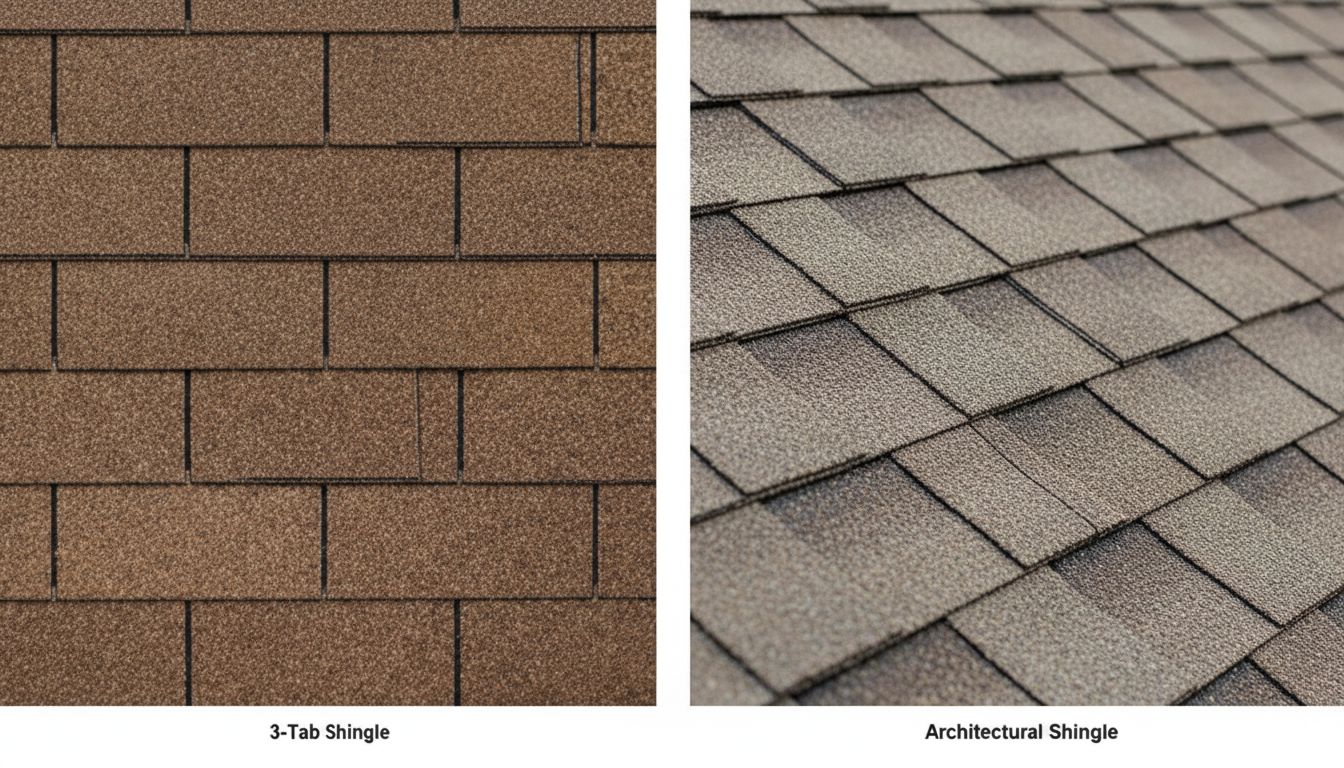
Both are wood roof products, but the manufacturing process differs. Wood shake shingles are split from the bolt of wood (or split on one side and sawn on the other), which creates a rough, textured face. Sawn wood shingles have smooth faces on both sides and a tapered thickness from butt to tip.
In practical terms: shakes are thicker, have more shadow line, and look rougher and more rustic. Sawn shingles look crisper and more uniform. Shakes typically cost 20-30% more than sawn shingles of the same cedar grade. Both require similar maintenance and installation practices.
Types of Cedar Roof Shingles and Grades
No. 1 Blue Label vs. Lower Grades
Cedar roof shingles are graded by the Cedar Shake and Shingle Bureau (CSSB). The grades matter a lot for longevity:
- No. 1 Blue Label: 100% clear, 100% edge grain, 100% heartwood. The only appropriate grade for roofing in wet or moderate climates.
- No. 2 Red Label: Allows flat grain and some sapwood. Acceptable in dry climates or for secondary applications.
- No. 3 Black Label: Utility grade. Not suitable for exposed roofing.
When comparing cedar shingles for sale, look for the label grade stamped on the bundle or the spec sheet from the supplier. Low prices on cedar roofing shingles sometimes mean you’re getting No. 2 grade passed off as premium material — ask for documentation.
Cedar Roofing Shingles: Sawn vs. Hand-Split
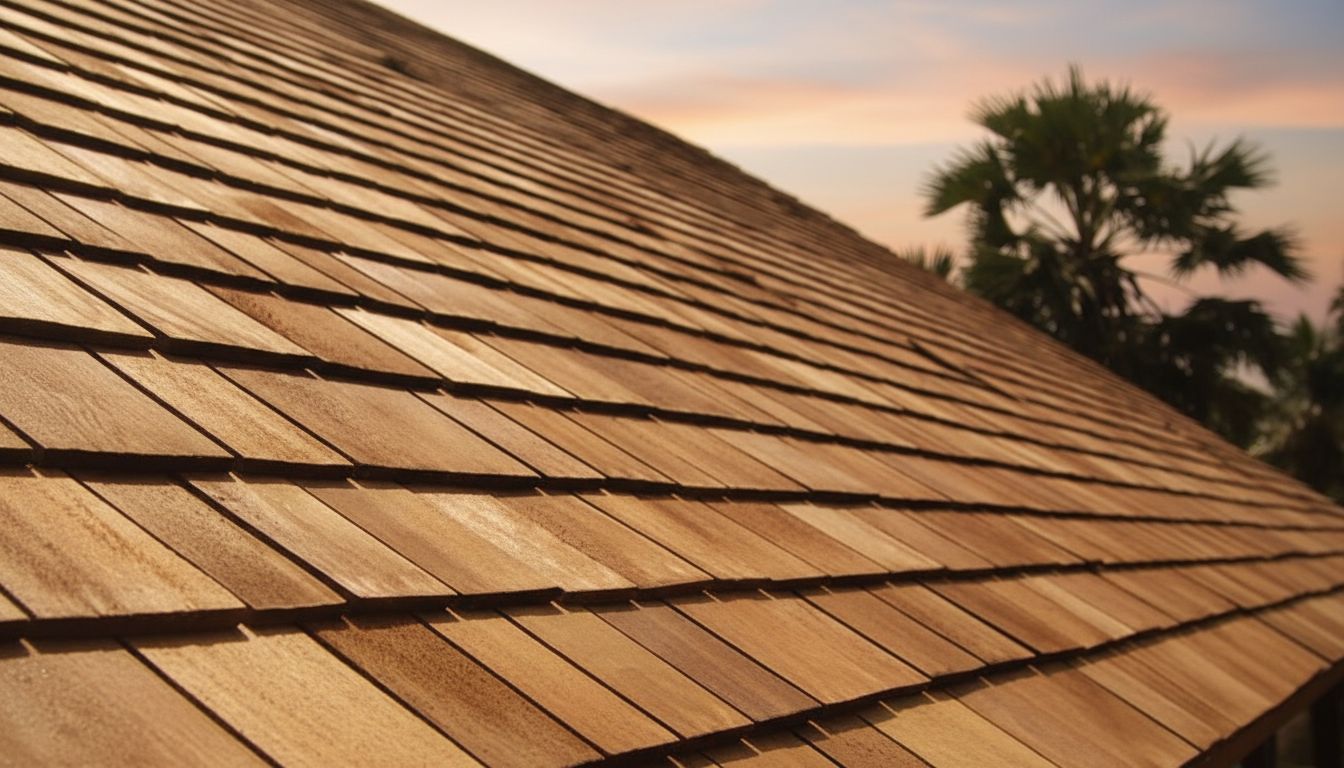
Hand-split-and-resawn cedar roofing shingles are the most common shake product. One face is rough (split), the other sawn smooth. This gives a shadow-line depth that reads well from the street and sheds water reliably because the smooth back lies flat against the sheathing or breather felt.
Straight-split shakes have a rough face on both sides and are less common. They’re traditional in historic districts but harder to source and install correctly. If you’re spec’ing cedar roofing shingles for a historic restoration project, verify which product your local historic commission requires before ordering.
Where to Find Cedar Shingles for Sale
Local Lumber Yards vs. Online Wood Shingles for Sale
Cedar shingles for sale through local lumber yards typically cost $120-$180 per square (100 square feet of coverage). You can inspect the material, pick up immediately, and return damaged bundles without shipping costs. For large projects, ask about contractor pricing — most yards discount at five squares or more.
Online wood shingles for sale can run cheaper per unit, but freight on a 2,000-pound pallet of cedar shingles adds up fast. Factor in delivery lead time and the risk of shipping damage. For projects over 20 squares, the local yard usually wins on total cost even if the per-bundle sticker price looks higher.
Installation Basics for Wood Shake Roofing
Wood shake shingles require specific installation details that differ from asphalt:
- Deck: Solid sheathing or skip sheathing (spaced boards) depending on regional practice. Skip sheathing allows ventilation behind the shingles and extends service life in humid climates.
- Felt: 18-inch wide strips of 30-lb felt laid between every course, lapped over the top of each shake by at least 2 inches. This inter-layering is not optional — omitting it voids most manufacturer specifications.
- Exposure: Standard exposure for 18-inch shakes is 7.5 inches; for 24-inch shakes, 10 inches. Increasing exposure beyond spec to save material undermines weather resistance.
- Fasteners: Two stainless or hot-dipped galvanized nails per shingle, placed 1 inch from each edge, at a height 1 inch above the exposure line. Never use electroplated nails — they fail quickly.
Installing wood shake shingles on pitches below 4:12 is not recommended unless you use a self-adhering underlayment system and increase overlap. Consult a roofing professional for low-slope applications.
Maintenance and Lifespan of Cedar Shake Roofs
A properly installed No. 1 grade cedar shake roof lasts 25-40 years in most climates. Pacific Northwest homes with consistent rain see the lower end of that range; dry Southwest climates can exceed 40 years with minimal care. Annual maintenance extends life significantly:
- Clean debris from valleys and gutters every fall
- Remove moss and lichen with zinc sulfate treatment (not pressure washing)
- Replace cracked or split individual shingles before they let water penetrate the inter-ply felt
- Apply a clear wood preservative every 5-7 years in wet climates
Pro tips recap: Buy No. 1 Blue Label cedar for any roofing application — the grade difference pays back in years of service life. Source locally when possible to inspect material before it goes on your roof. Follow installation exposure specs exactly — the details that look like overkill are what keep a cedar roof waterproof for decades.